This is a walkthrough guide covering every VisualEditor features.
Opening the editor[edit source]
To open the editor, go to the page you want to edit and click "Edit" on top of the pages.

It may take a few seconds for the page to open for editing, and longer if the page is very long.
Pressing on the File:WikiText.svg tab will open the wikitext source editor. Once its loaded, your toolbar should look like this, and now i will cover each feature one by one.

Undo and Redo[edit source]
These two can be very helpful if you made a mistake, clicking undo reverse last action, while redo repeat previously undone action.

Tips: You can use shortcut, Ctrl + Z for undo and Ctrl + Y to redo
Headings[edit source]
In general, headings allows you to change how the paragraph is formatted.

Text formatting[edit source]
Lets write down some information first.

Bold and italic[edit source]
To apply bold and italic into text, select the text then click A on the toolbar then click Bold or Italics. To apply both bold and italics to the same text, simply click both buttons.

Alternatively you can use shortcuts for faster formatting, their shortcut can be seen on the right side.
Other formatting[edit source]
Clicking more will show other text format. But they won't be used that much, here's a quick rundown of them:

| Format | Description | Preview |
|---|---|---|
| Superscript (x2) | Makes the selected text to appear smaller and higher than surrounding text. | Loremipsum |
| Subscript (x2) | Makes the selected text to appear smaller and lower than surrounding text. | Loremipsum |
Computer code {}
|
Changes the font of the selected text to a monospaced font, which sets it apart from surrounding (proportionally spaced) text. | Lorem ipsum
|
| Strikethrough ( |
Adds a solid bar through the selected text | |
| Underline (U) | Adds a solid line beneath the selected text. | Lorem ipsum |
| Big (A) | Make text appears slightly bigger. | Lorem ipsum |
| Small (A) | Make text appears slightly smaller. | Lorem ipsum |
| Language (文A) | Allows you to label the language (for example, Japanese) and direction (for example, right-to-left) of the selected text. | |
| Remove (File:Cancel.svg) | Removes all character formatting from the selected text, including links. |
Linking[edit source]
Links are very important when you are refferring something, select the text and click link (Ctrl + K). You can link an existing article or external website.

Clicking "change text" will allow you to change the linked text.
Note: If you mention the same thing multiple times, it should only be linked once except infoboxes. Learn more here.
Cite[edit source]
Cite has two aspects, in-text citations and footnote.
- Citations : Used to back up claims by referring to sources that support your statements or provide evidence.
- Footnote: Used to clarify, add additional information, or provide detailed citations without disrupting the main text.
The two can be added using the cite option

Clicking basic will open up references panel, where you can insert citations or footnote. After that a reference should appear right next to the text[1].
References example[edit source]
- ↑ Like this!
To see how to use citations properly, see the citations guide.
Listing[edit source]
There are two types, bulleted lists and numbered lists. Numbered lists are typically used for items that need to follow a specific sequence, such as a set of instructions, while bulleted lists are suitable for presenting items without any particular order.

When a list is active you can press enter to create another list, and press enter again if you are done with the listing.
Insert[edit source]
Images[edit source]
Inserting images is easy, click 'Images and media' on the Insert menu.

This should open a menu where you can search a existing image or upload your own images. Clicking the image in this menu displays a full view along with additional information about it.

For this guide i will pick "deksy glass.png" as an example. In "General" you can set image caption of it which is used to describe what's happening on the image. Then, there's alternative text which is a text description for people who can't see the image, the description should be enough for them to understand the purpose and information given by the image.

In "Advanced" section, you can adjust how will the image behave, like their position, type, and the size. Clicking "Insert" on the top right will add the image on where your insertion point at.

After inserting the image on the page, you can relocate it by clicking and dragging, adjust its size using the handles at each corner, and revisit the settings by clicking the image and selecting the icon/text in the popup.

Template[edit source]
Below 'Images and media' there's template, here you can find all template available to use across the wiki. If you are planning to create pages with templates ready, go to the page creator instead.
Table[edit source]
Table is a container for data that is organized in rows and columns to make it easier to manage and analyze. I will only cover the basic of it since table is more easier to edit in source mode. On the same menu, clicking the table will insert 4 by 4 blank table into the page.

Click once on a cell will allow you to edit but deletes any existing text. While double clicking edits the existing text. You can insert or add images, links, and text format to the table cell.

Lets fill the blank table with some information first. To add, move, and remove cells, you can click the arrow which will let you manage it.

Clicking on properties will show some settings you can set to the table.

Comment[edit source]
Comment option can be found by clicking more option.

Comment allows you to leave notes without making it appears on published page. Notes can be only read when editing.


Gallery[edit source]
Just like inserting images but multiple of them in one form.

Gallery can be displayed in multiple variants.

the followings are previews what they look like:
Traditional[edit source]
The gallery default mode.
-
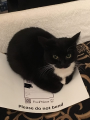
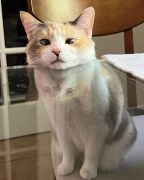
Maxwell
-
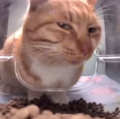
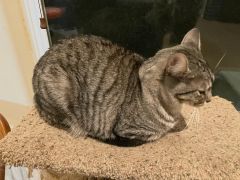
Mr. Fresh
-

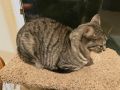
Cocoa
-

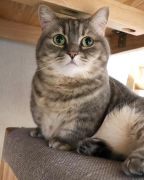
Panko
-

Uni
-
Zazu


Traditional with no outlines[edit source]
Similar to traditional, but with no border lines.
-
Maxwell
-
Mr. Fresh
-
Cocoa
-
Panko
-
Uni
-
Zazu
Packed[edit source]
Packed causes images to have the same height but different widths, with little space between the images. The rows in this responsive mode organize themselves according to the width of the screen.
-

Maxwell
-

Mr. Fresh
-
Cocoa
-
Panko
-

Uni
-
Zazu
Packed with overlay caption[edit source]
Shows the caption overlaid on the image, in a semi-transparent white box.
-
Maxwell
-
Mr. Fresh
-
Cocoa
-
Panko
-
Uni
-
Zazu